How to print out a workout?
Our Print Feature allows you to generate a print-out that includes instructions, images, a tracking sheet, and even a previous stats section that your clients can use to track their progress!
You can print out workouts or their entire training phase by following these steps:
How to Print Workouts:
Option 1 - Print from the Training Program Page
- Login to http://risemethod.trainerize.com/
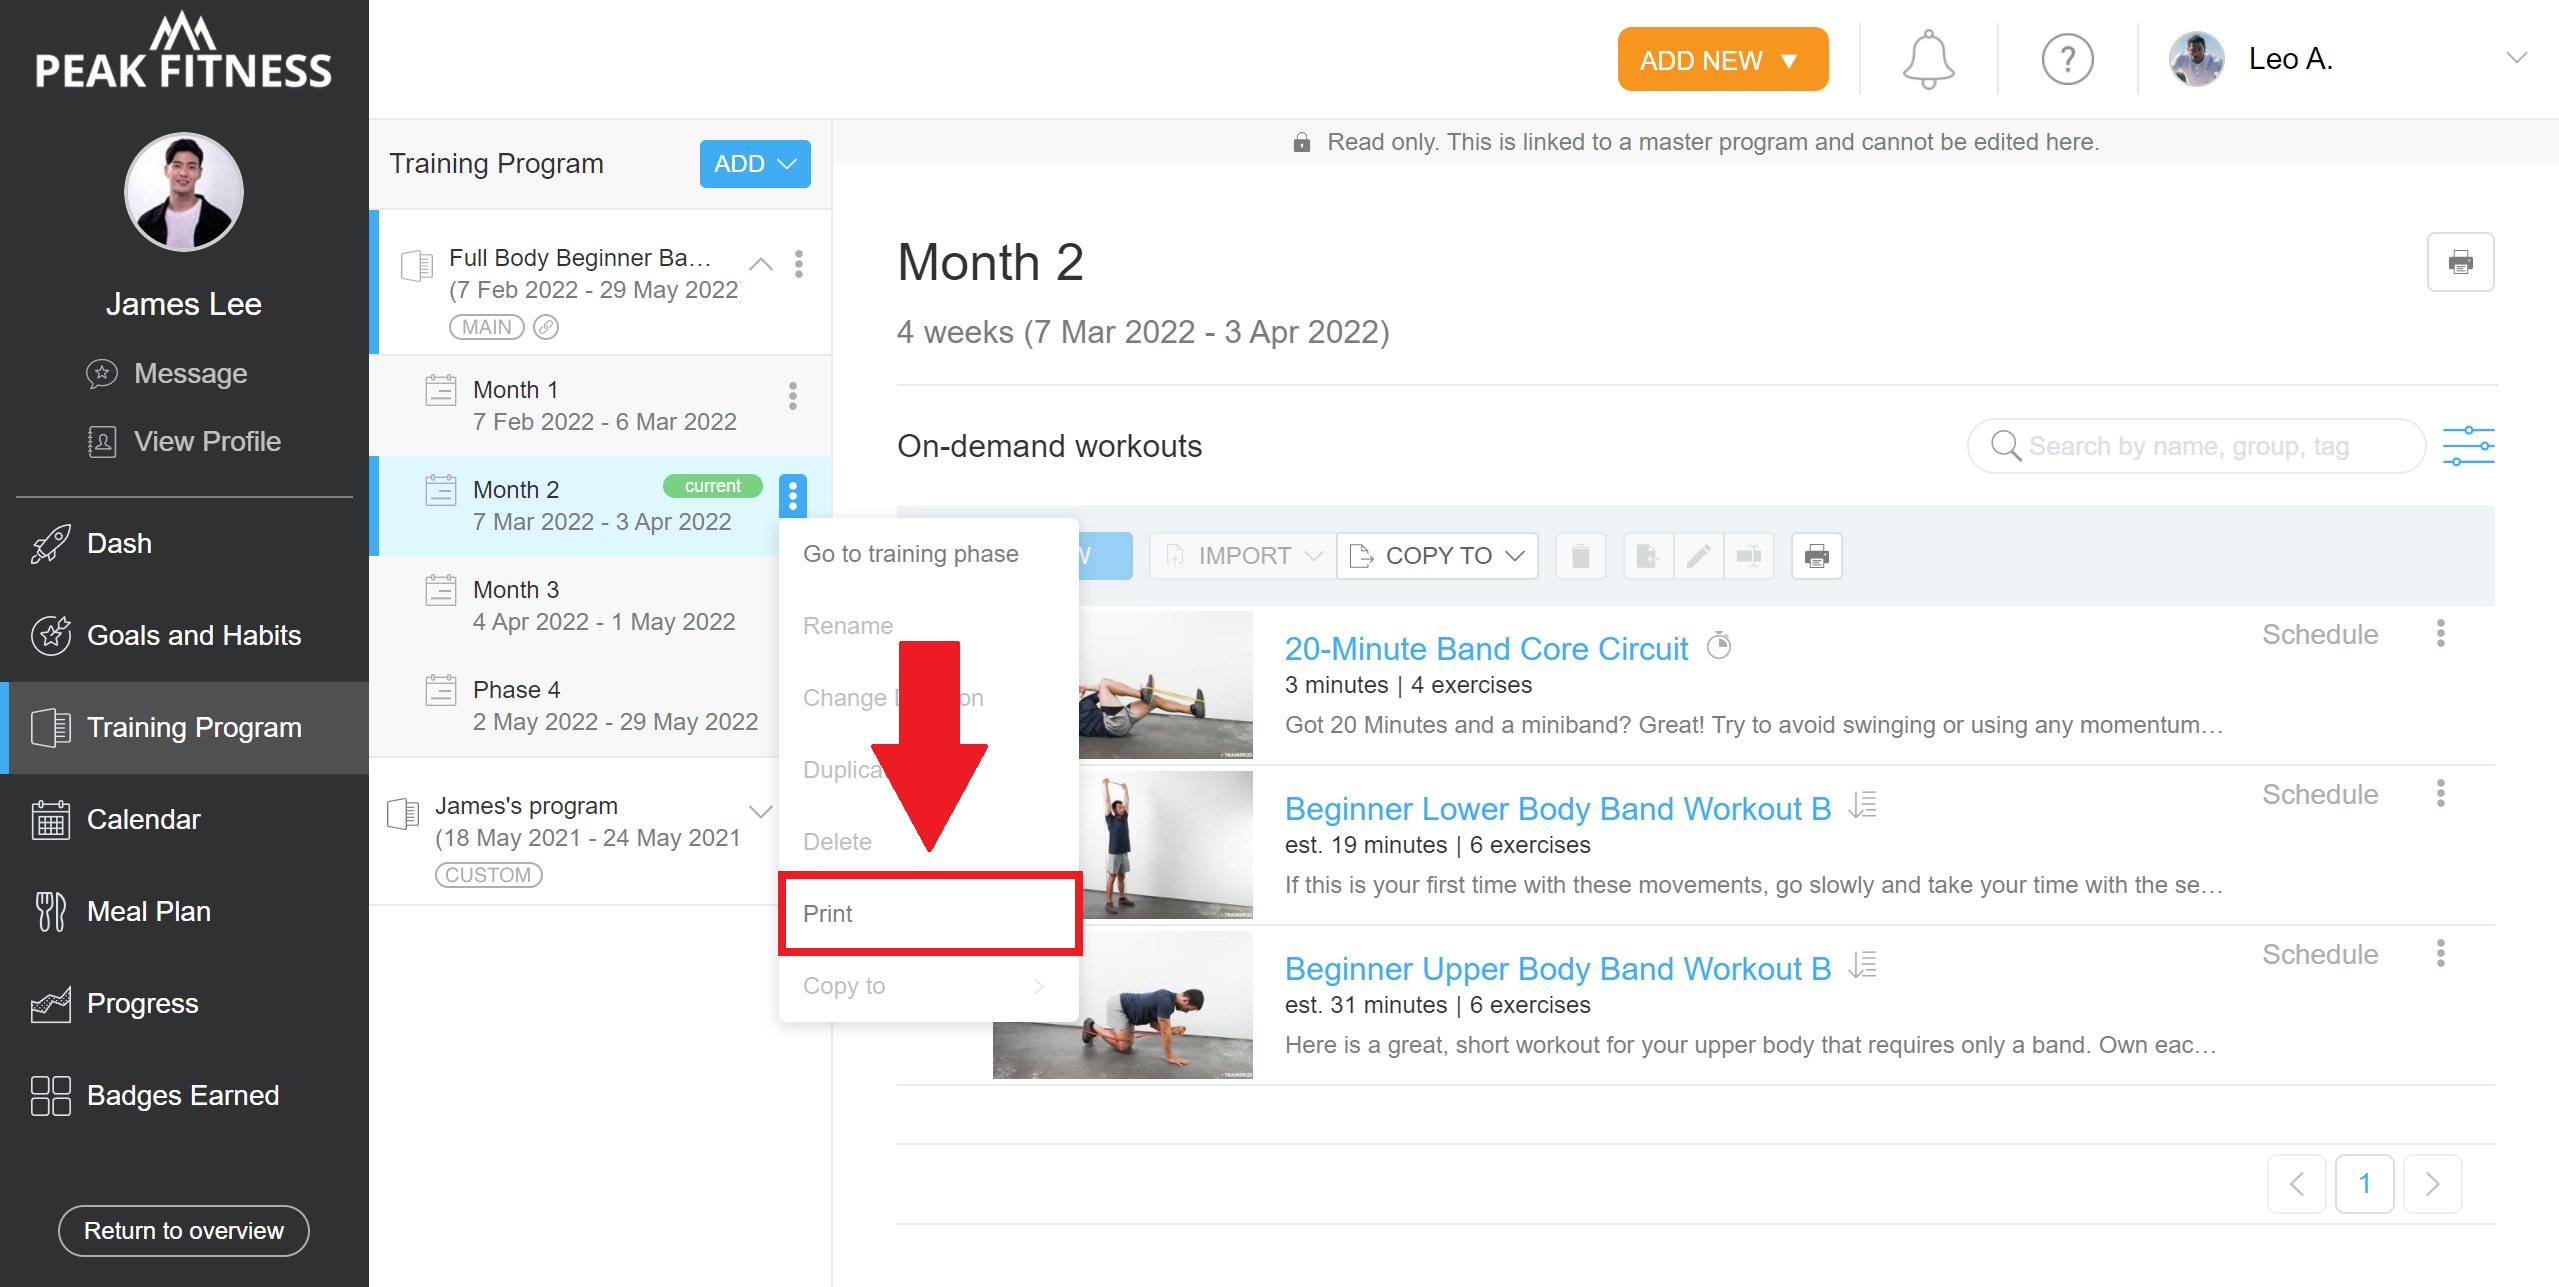
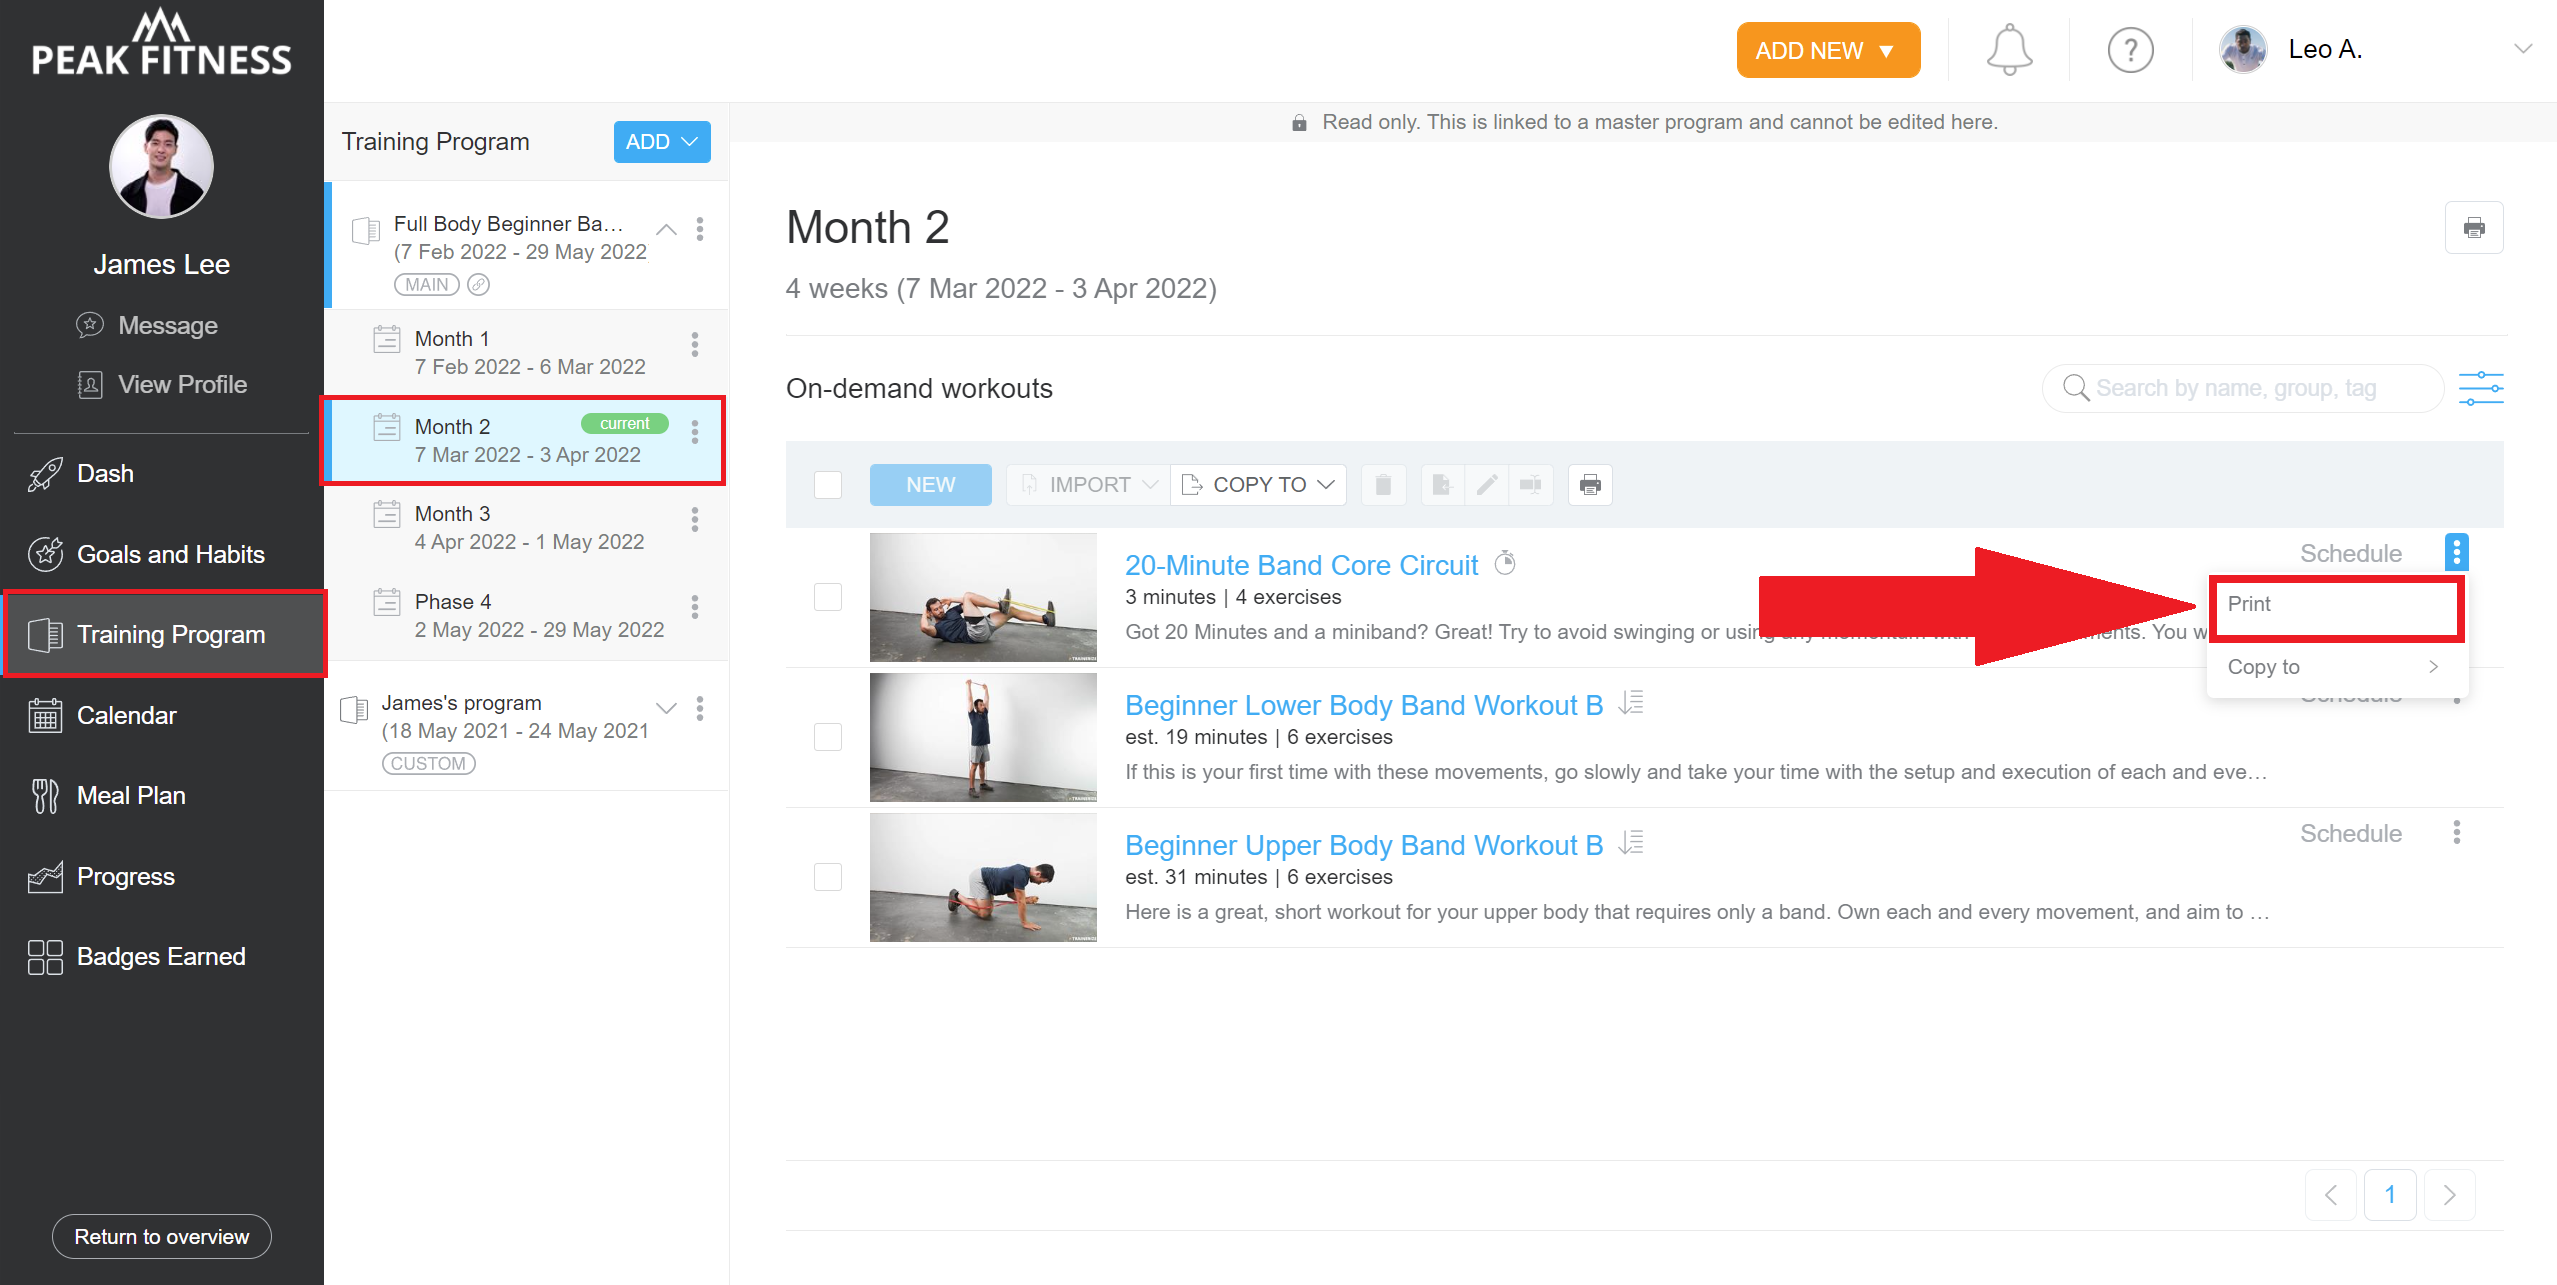
- Click on Training Program section (found on the left navigation bar)
- Click to select the Training Phase that contains the workouts you wish to print
- Click the three dots drop down menu on the right side of the workout that you wish to print.
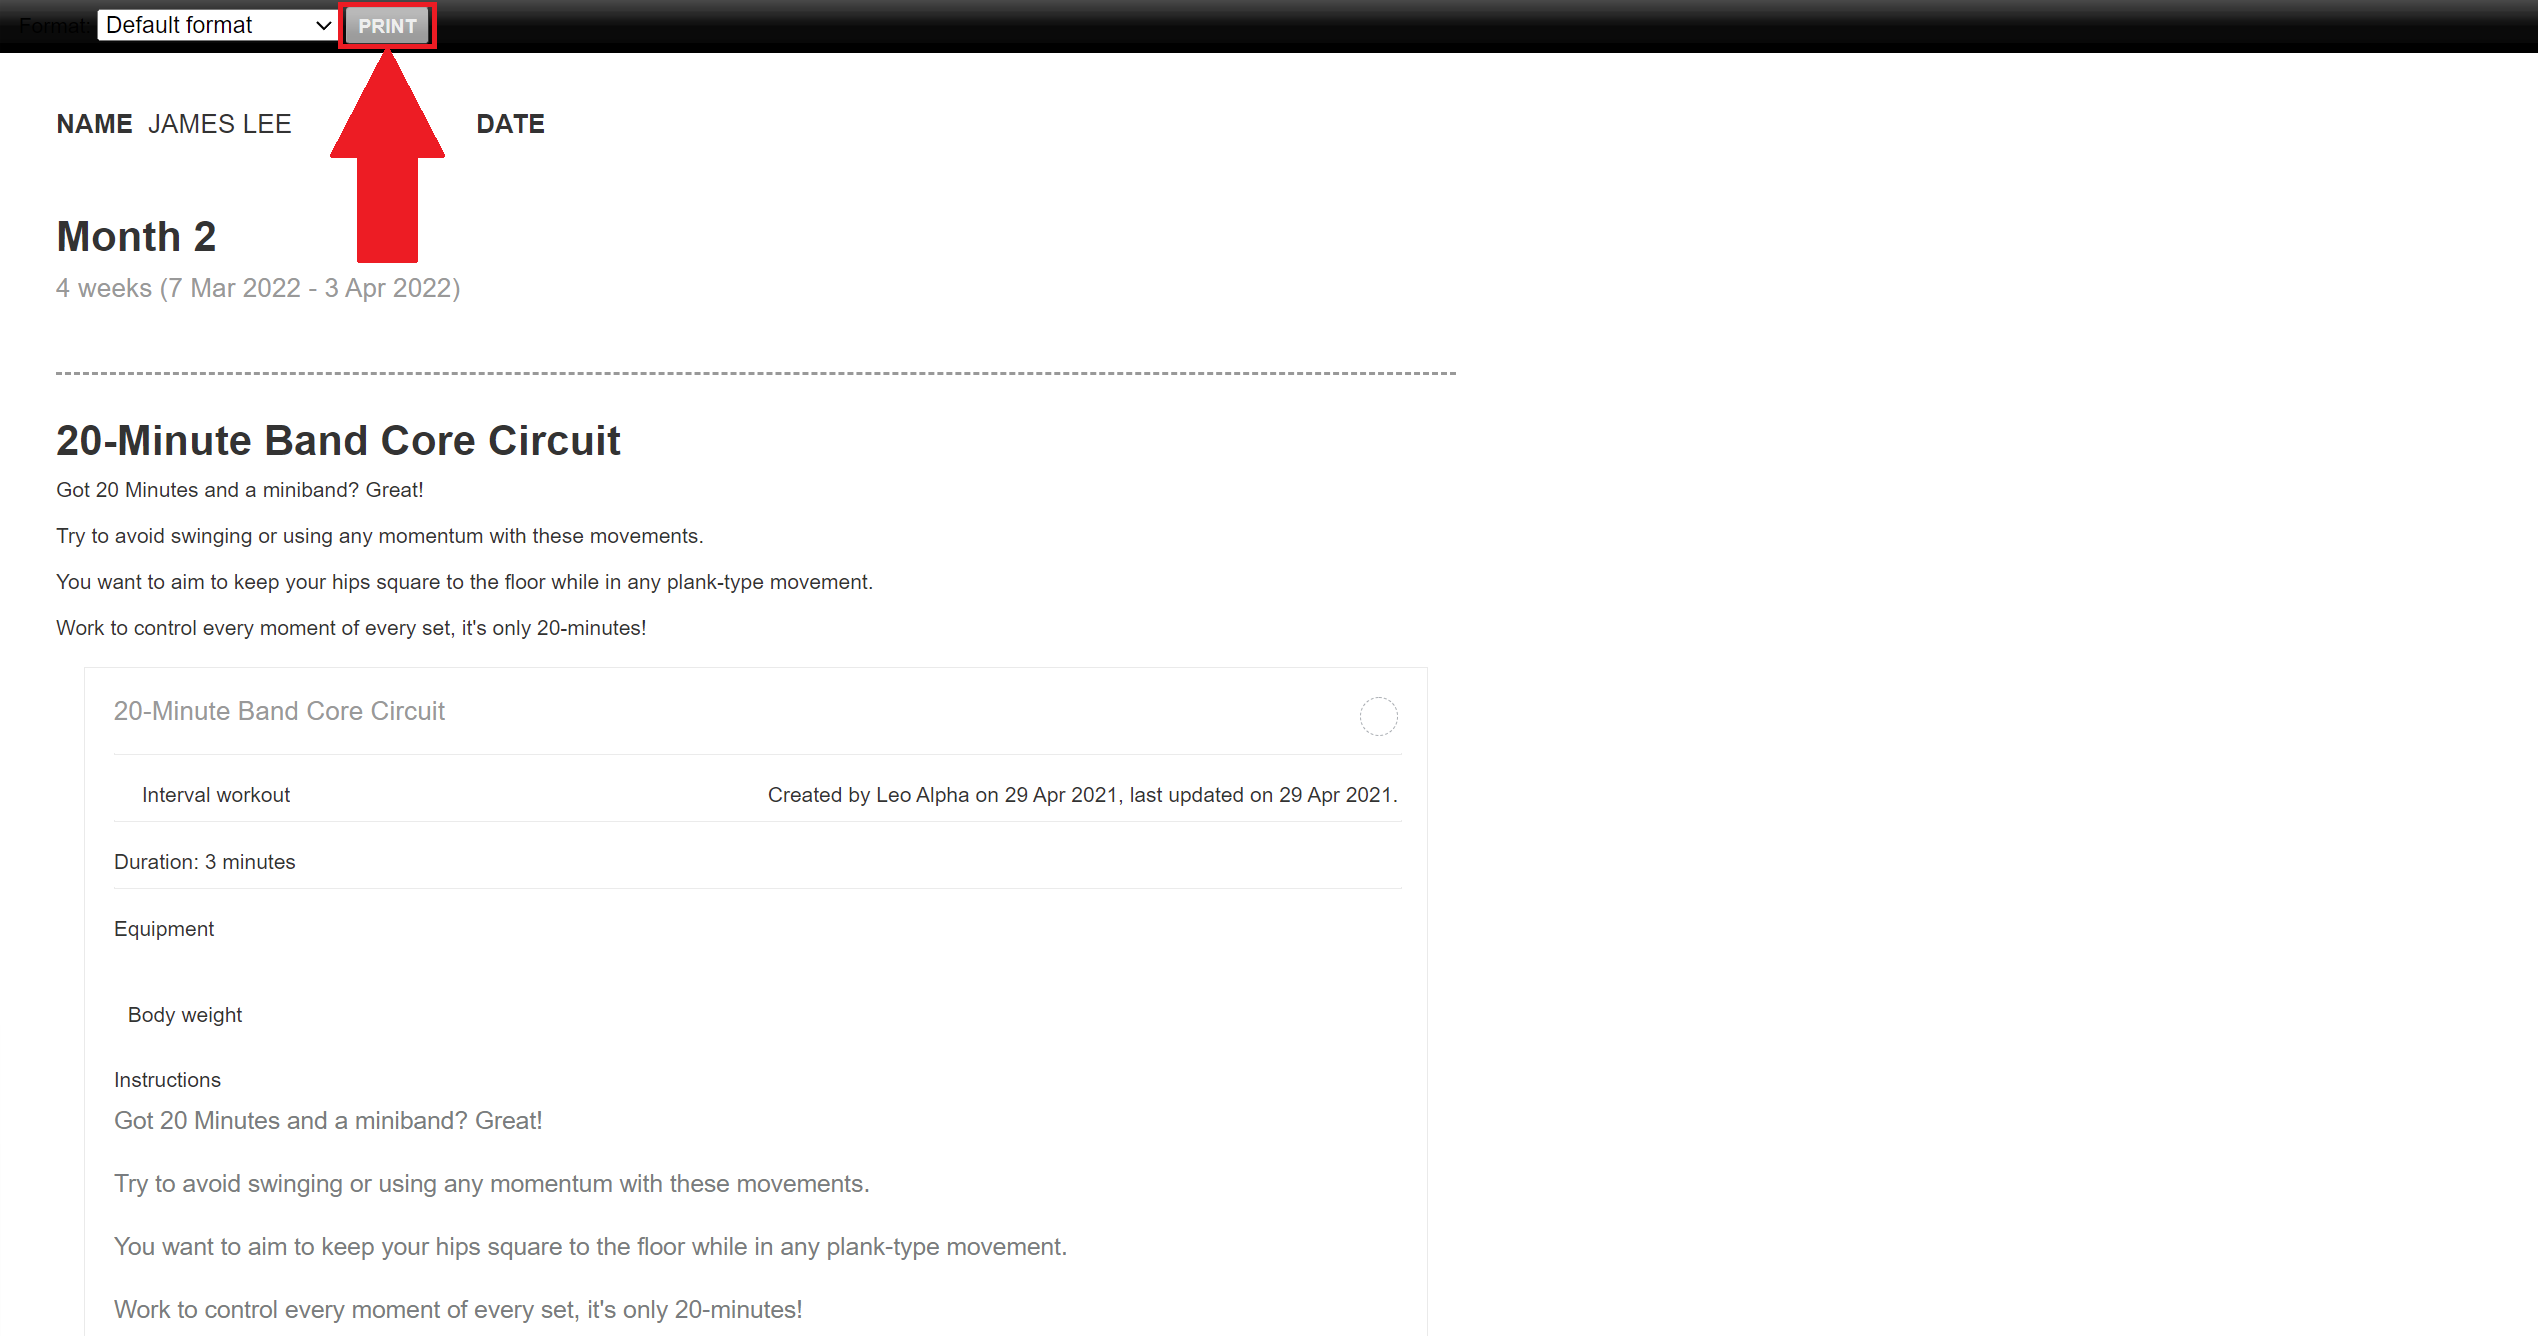
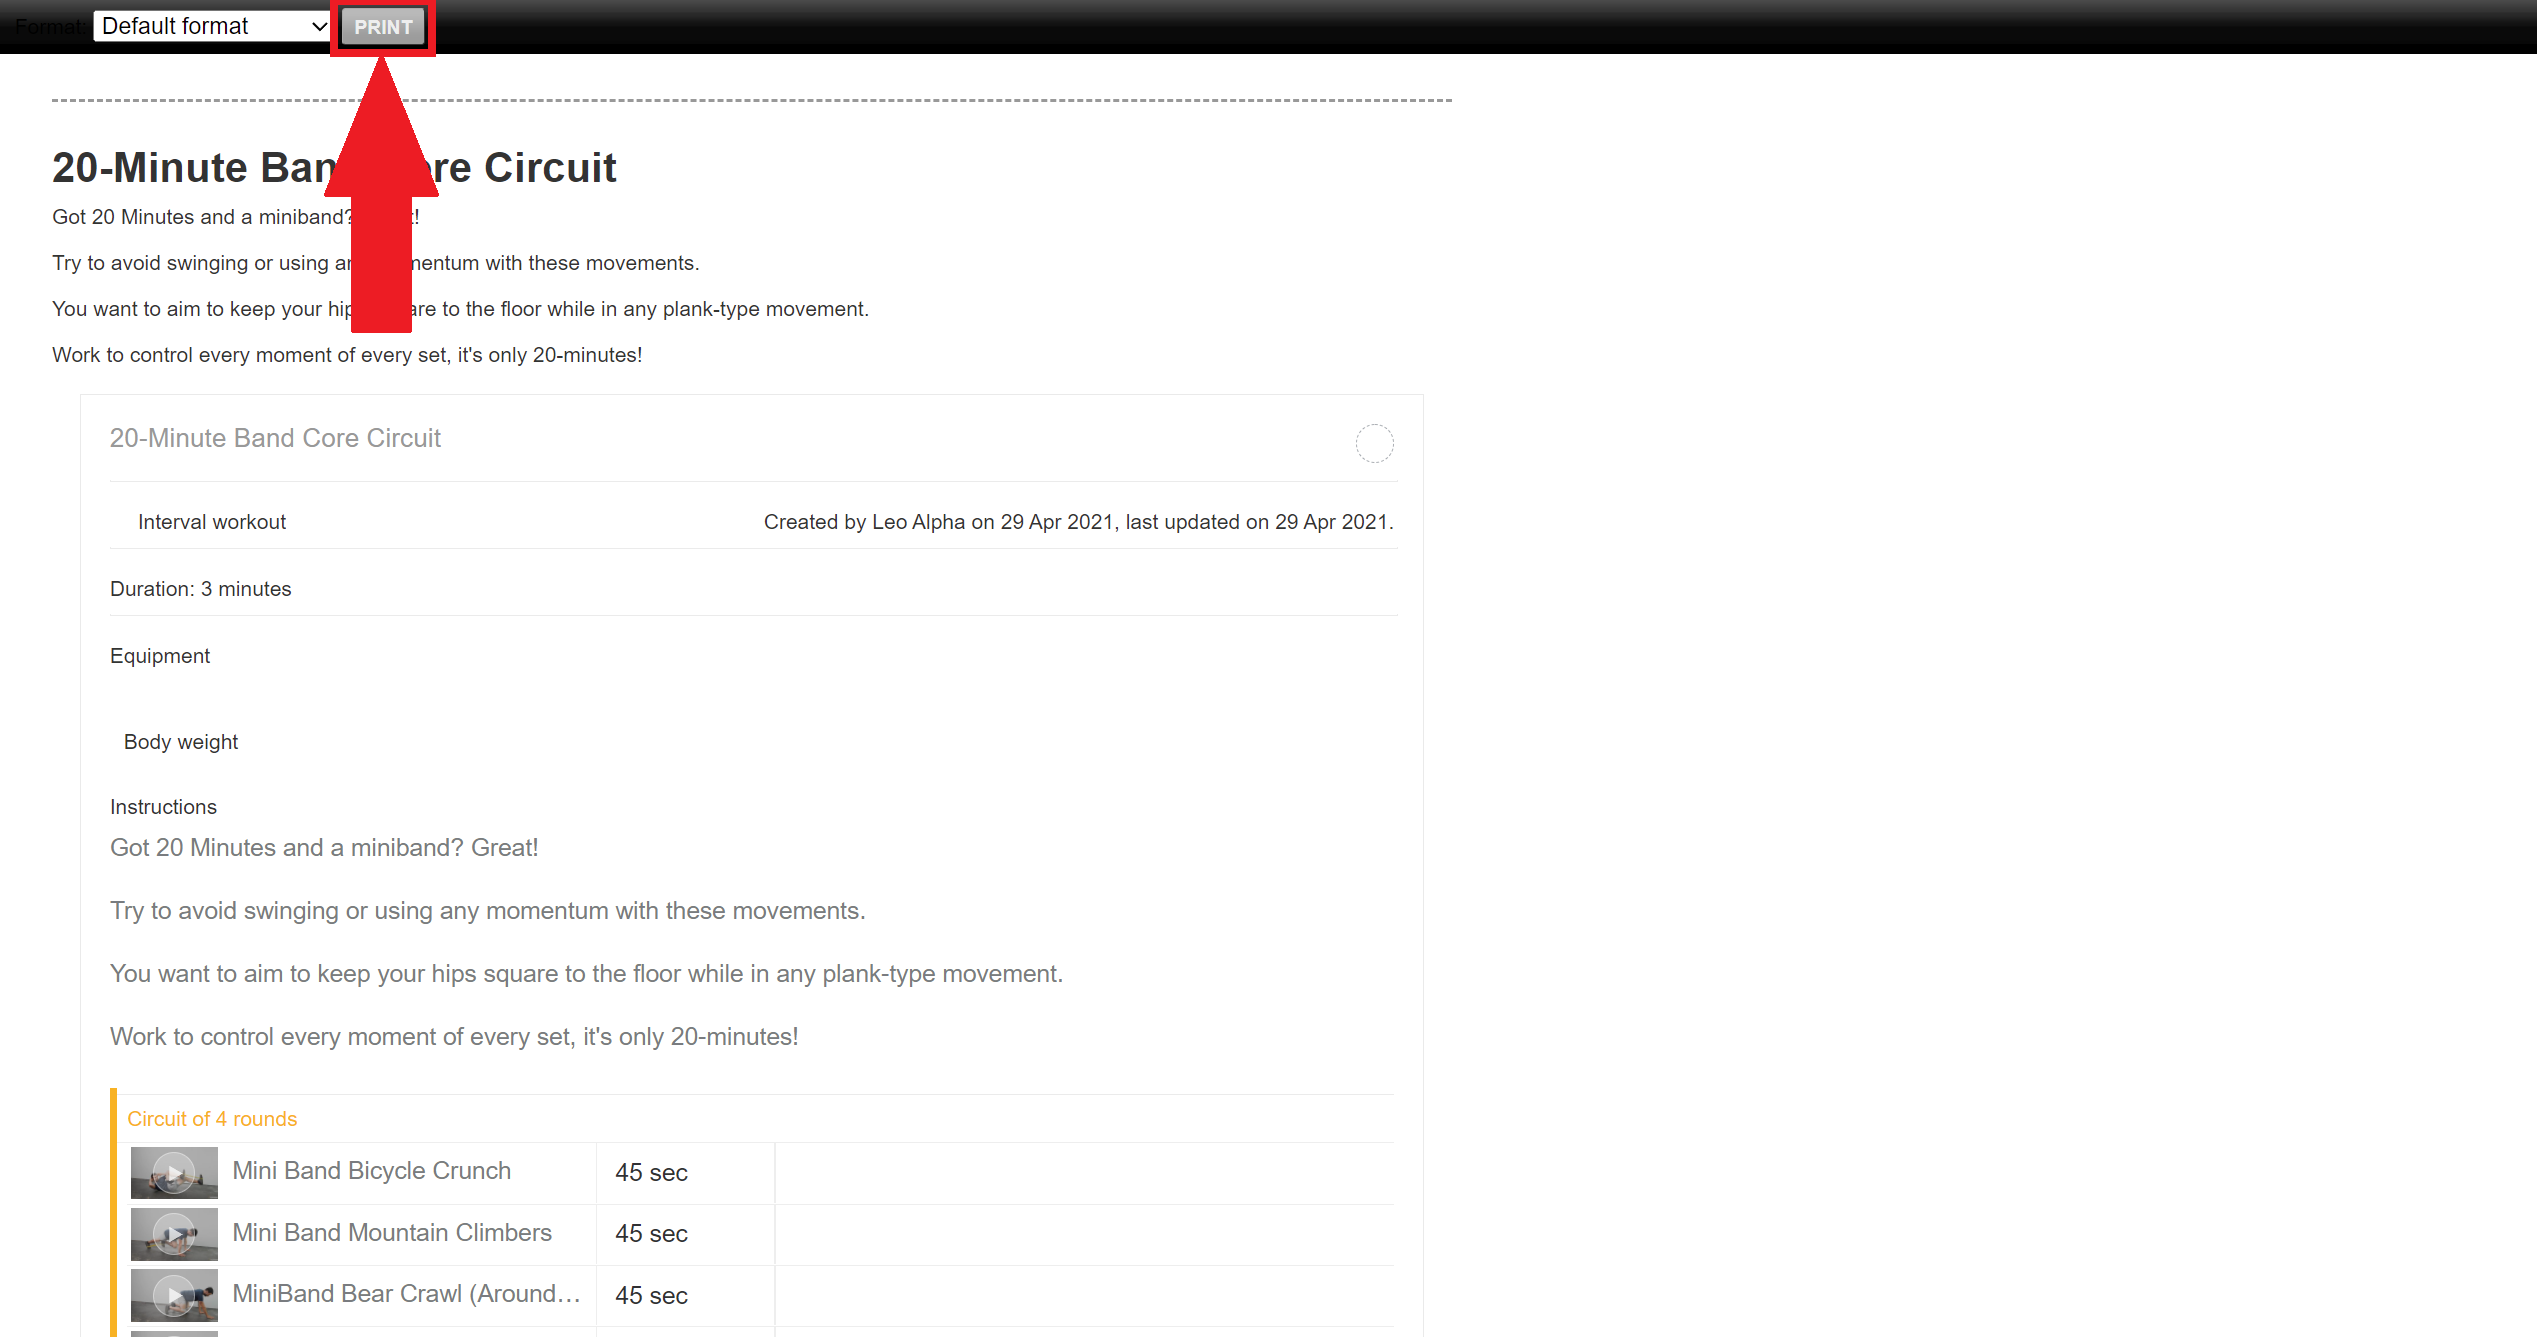
- This will then bring open a seperate window in the browser to print the workout.
- At the top of the new window, click Print.
Option 2 - Print from the Workout on the Calendar
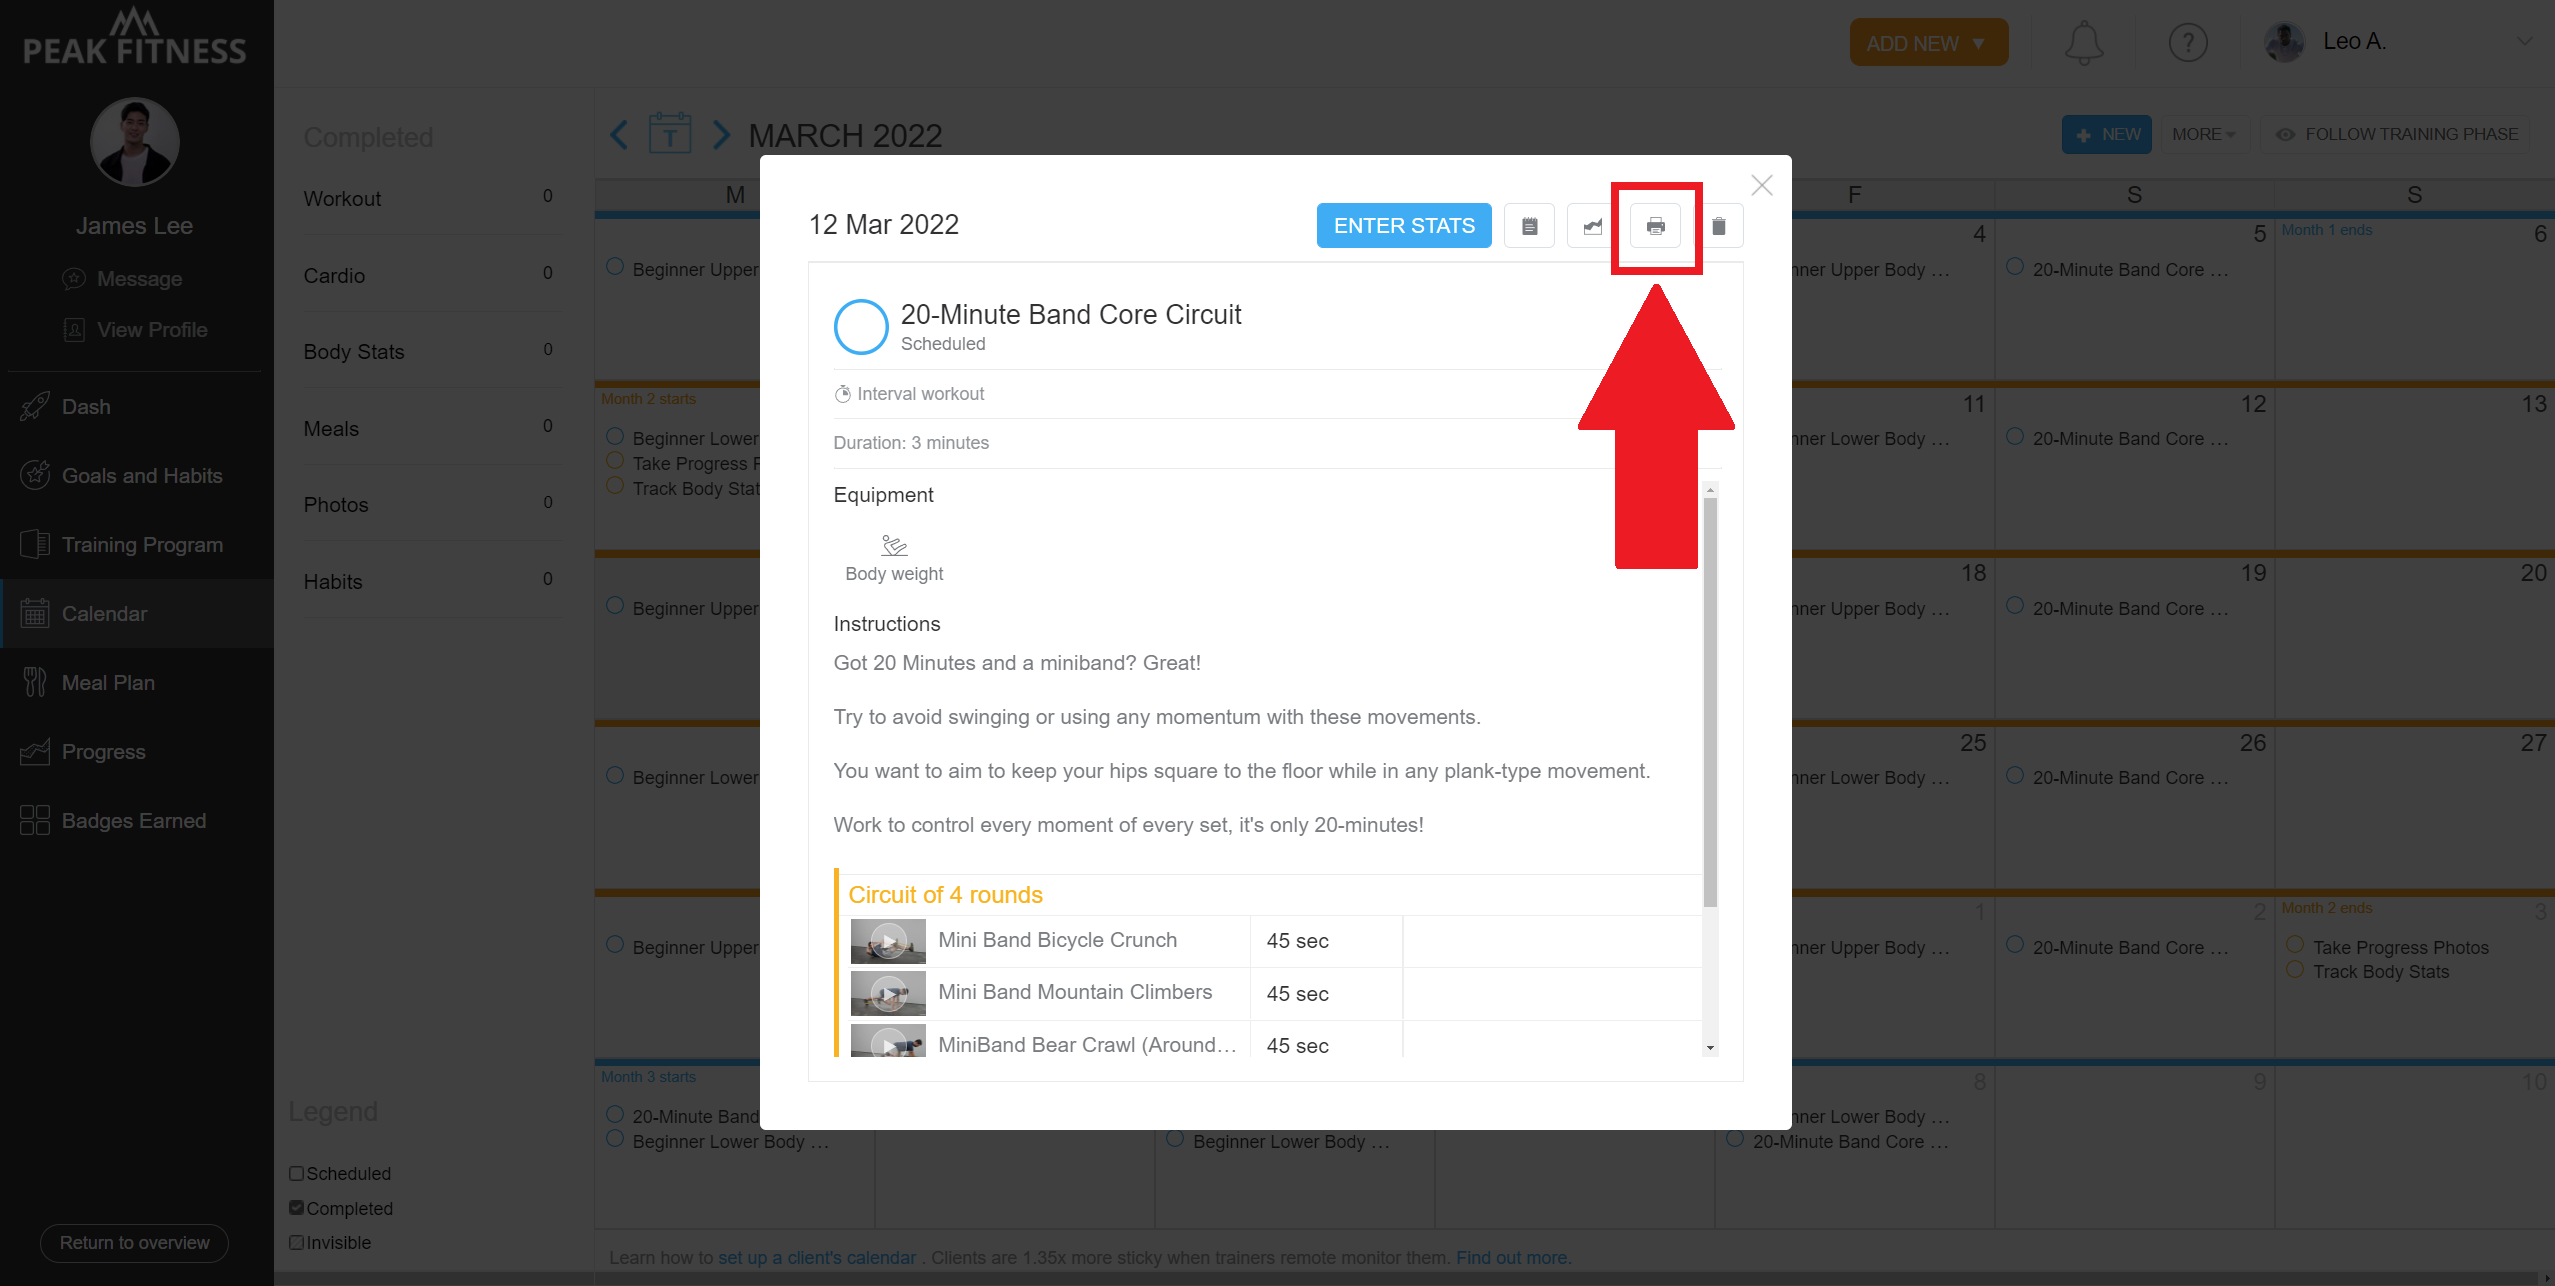
- Open a specific client Profile (click the Open button next to the client's name)
- Click on Calendar of your client
- Click on any Workout scheduled into the calendar (Workouts must be scheduled for them to appear)
- Click on the Print icon in the top right of the pop-up box.
Option 3 - Print an entire Training Phase
- Click on Training Program section (found on the left navigation bar)
- Click to select the Training Phase that contains the workouts you wish to print
- Click the Print icon at the top right of the Training Phase or click the three dot drop down menu beside the name of the phase and click Print.
- This will bring open a seperate window to print the entire Training Phase and all of the Workouts in the Phase.
- At the top of the new window, click Print.